
Bullet seating depth is one of the most influential variables in precision reloading. A difference of just a few hundredths of a millimeter can make the difference between an average group and a ragged hole. In this article, you'll learn how to determine, measure, and reproduce the optimal seating depth.
Why Seating Depth Matters So Much
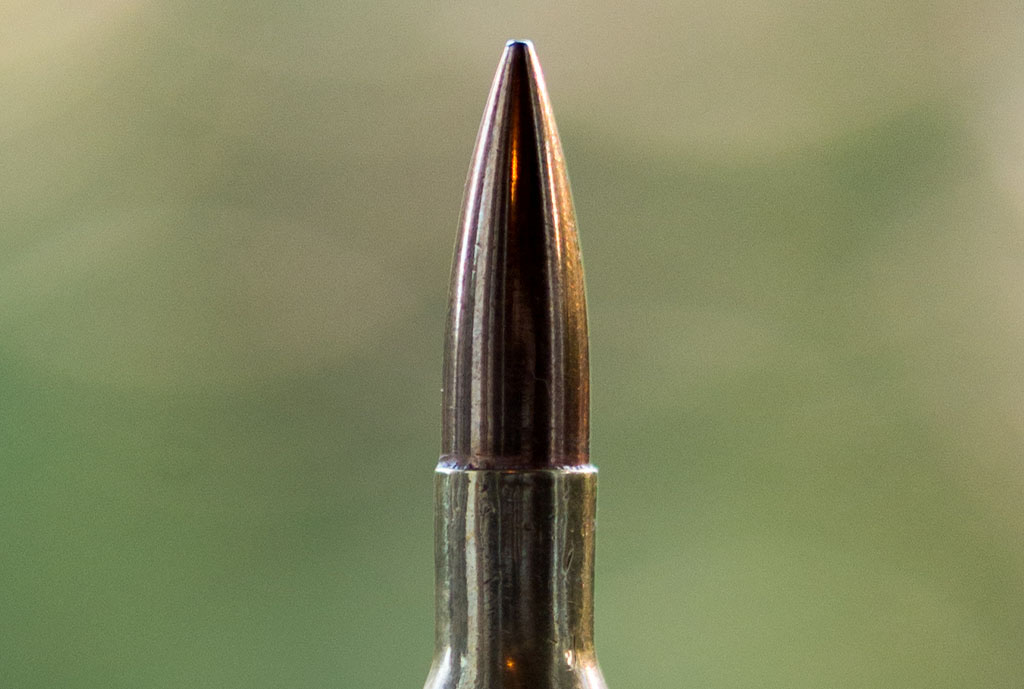
When a cartridge is fired, the bullet must first travel through the freebore of the chamber before reaching the lands and grooves. The distance the bullet travels before making contact with the lands, the so-called "jump," has a direct influence on pressure buildup, how the bullet enters the barrel, and ultimately accuracy.
Some bullets perform optimally when they just touch the lands (jam), while others need a small jump to perform consistently. VLD bullets with their long, pointed nose often behave differently than tangent ogive designs. Finding the sweet spot for your specific combination of rifle, bullet, and load is where the art of precision reloading begins.
COAL versus CBTO: Understanding the Difference
Many reloaders only measure the Cartridge Overall Length (COAL), the total length of the cartridge from base to tip. This is fine for checking whether cartridges fit in the magazine, but for precision work, it falls short.
The problem? The tip of a bullet varies. Even within one lot of bullets, the meplats (tips) can differ by several tenths. When you measure COAL, you're actually measuring a variable point that says nothing about where the bullet actually contacts the lands.
The solution is measuring to the ogive, the point on the bullet where it makes contact with the lands. This is called the CBTO: Cartridge Base To Ogive. By measuring to a fixed point on the ogive, you eliminate variation in the bullet tip and get a truly consistent seating depth.
The Derraco Ugly Headspace and Bullet Comparator Set contains comparators for different calibers and a headspace tool for complete measurements.
Required Measuring Equipment
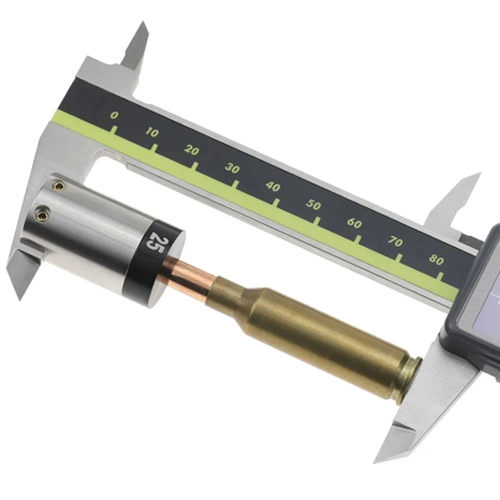
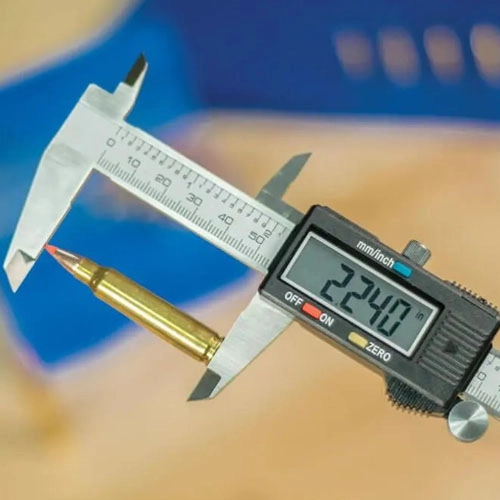
To accurately measure CBTO, you need specific equipment. A standard caliper alone is not sufficient; you need a comparator that measures to the ogive instead of the tip.
Caliper with Comparator
The foundation is a good digital caliper. Choose a model with sufficient measuring range (minimum 150mm) and a resolution of 0.01mm. The caliper must be stable and not wobble during measurement.
The Frankford Arsenal digital caliper provides the precision needed for consistent measurements.
On the caliper, you mount a bullet comparator. This is a bushing with an opening that fits your bullet's caliber. The bullet protrudes through the opening to the point where the ogive contacts the edge of the bushing. This point corresponds to where the bullet contacts the lands in the barrel.
Comparator Stand for Repeatability
For the highest precision, a fixed measuring setup is recommended. A comparator stand holds your caliper and comparator in a fixed position, ensuring you always measure the same way. This eliminates variation from different measuring angles or pressure.
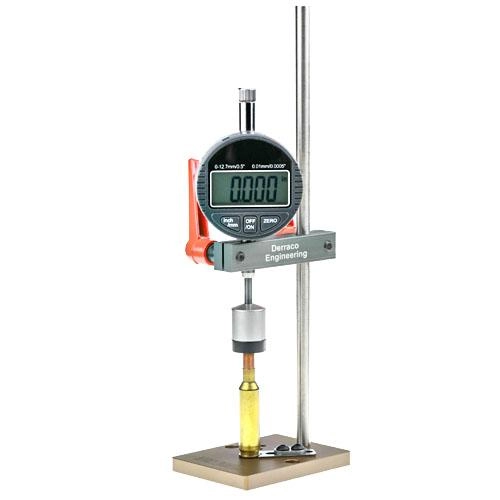
The Derraco Up Right Comparator Dial Stand ensures consistent measurements through its fixed setup.
Determining the Distance to the Lands
Before you can experiment with seating depth, you first need to know where the lands begin in your specific chamber. This differs per rifle, even with identical calibers. The freebore length, barrel wear, and the specific bullet you're using all determine where contact occurs.
OAL Gauge Method
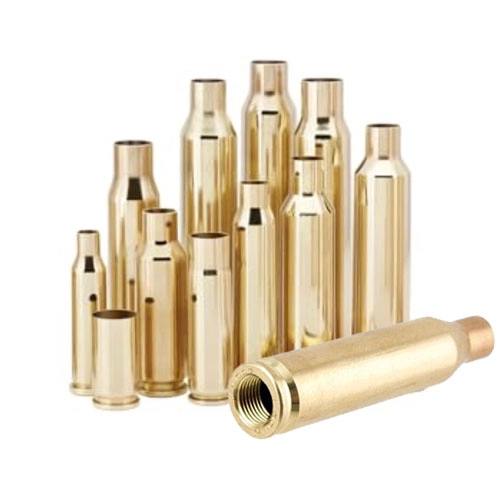
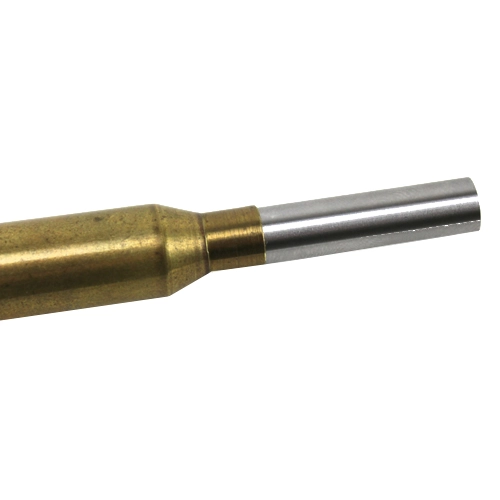
The most reliable method for determining the distance to the lands is with an OAL gauge in combination with a modified case. The modified case is a case of your caliber with a hole in the back through which you can slide a rod.
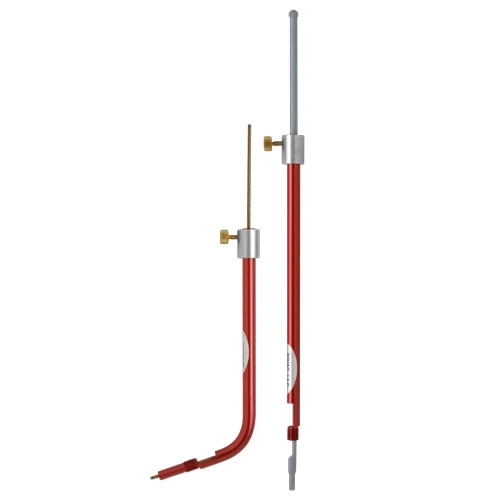
The Hornady Lock-N-Load OAL Gauge is the standard tool for determining the distance to the lands.
You place a bullet in the modified case, chamber it, and gently push the bullet forward until it touches the lands. The rod at the back now marks the exact position. Remove the case and measure the CBTO with your comparator. This is your "jam" length, the point where the bullet exactly touches the lands.
The Hornady Modified Cases are available for virtually all popular calibers.
Repeat this measurement at least three times and take the average. Small variations are normal, but measurements should be within 0.02mm of each other. Larger variations indicate inconsistent measuring technique.
From Measurement to Seating Depth
Now that you know the jam length, you can begin determining your optimal seating depth. Most precision shooters start with a jump of 0.5mm to 1.0mm (0.020" to 0.040") from the lands.
Choosing a Starting Point
The ideal starting point depends on the bullet type:
Secant ogive bullets (VLD types) such as Berger VLD and Hornady ELD-M are often sensitive to seating depth. These bullets usually perform better with more jump; start around 0.5mm to 0.8mm from the lands.
Tangent ogive bullets such as Sierra MatchKing and Lapua Scenar are generally more tolerant. You can start closer to the lands, around 0.3mm to 0.5mm jump.
Hybrid ogive bullets such as Berger Hybrid Target combine characteristics of both designs and are often the least sensitive to seating depth variations.
Micrometer Seating Die
For reproducibly setting your seating depth, a micrometer seating die is essential. A standard seating die works with threads, where one full turn gives a relatively large change. A micrometer seating die offers adjustments in increments of 0.01mm or smaller.
The Sinclair Micrometer Seating Die by Le Wilson provides the fine adjustment needed for precision seating.
Ladder Test for Seating Depth
The most effective method for finding optimal seating depth is a systematic ladder test. Here you load series of cartridges with different seating depths and shoot them under controlled conditions.
Test Protocol
Start with your starting point and load five cartridges. Then load five cartridges 0.1mm deeper, then five at 0.2mm deeper, and so on. A typical test includes five to seven different depths.
Shoot each series at a separate target under conditions as constant as possible. Note the group size, but also pay attention to the shape of the groups. A round group often indicates a good node, while vertical stringing may indicate suboptimal seating depth or charge variation.
Analyze the results and identify the seating depth with the smallest group. Then test around this point with smaller increments (0.05mm) to find the exact sweet spot.
The Role of Neck Tension
Seating depth doesn't stand alone. The force with which the neck holds the bullet, the neck tension, affects how consistently the bullet is released. Too little tension and the bullet can shift during handling or from the recoil of the previous shot in the magazine. Too much tension can lead to inconsistent release and damage to the bullet.
Measuring Neck Tension
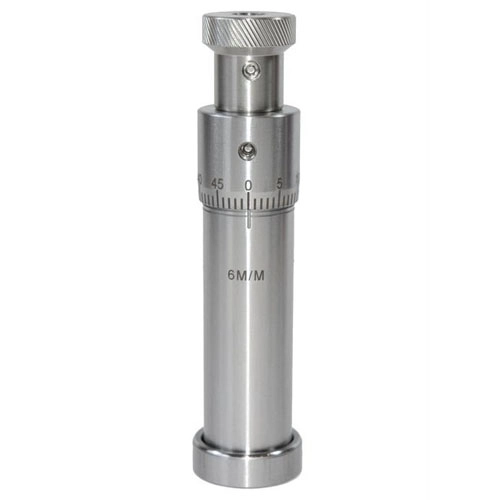
Neck tension is determined by the difference between the inside diameter of the neck and the outside diameter of the bullet. For most applications, an interference of 0.025mm to 0.05mm (0.001" to 0.002") is ideal.
To consistently check neck thickness, you use a tube micrometer. This tool precisely measures the wall thickness of the neck, allowing you to identify variations between cases.
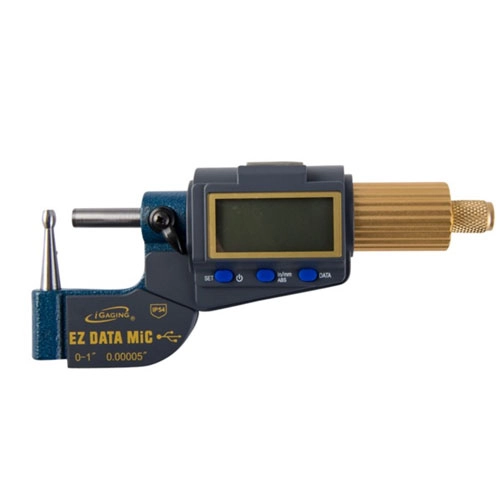
The iGaging EZ Data Tube Micrometer is specially designed for measuring neck thickness on cases.
Neck Tension Gauge Pins
For directly checking neck tension after resizing, gauge pins are a practical tool. These calibrated pins in ascending diameters let you feel and measure how much tension the neck provides.
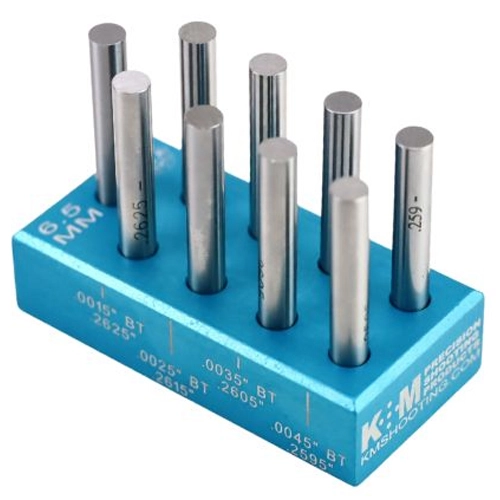
The K&M Precision Gauge Pin Sets provide accurate control over your neck tension.
The gauge pins are pushed through the neck to directly feel and measure the tension.
Annealing for Consistent Neck Tension
After multiple reloads, the brass of the case becomes hard and brittle from repeated deformation. This leads to inconsistent neck tension and eventually cracks in the neck. Annealing, the controlled heating of the neck, restores the original properties of the brass.
By annealing regularly, typically every three to five loading cycles, neck tension remains consistent between cases and across multiple loading sessions. This directly contributes to reproducible seating depth and thus better precision.
Annealing Options
There are various methods for annealing cases, from simple torch setups to advanced induction equipment.
The Ugly Annealer with torch offers an affordable entry into case annealing.
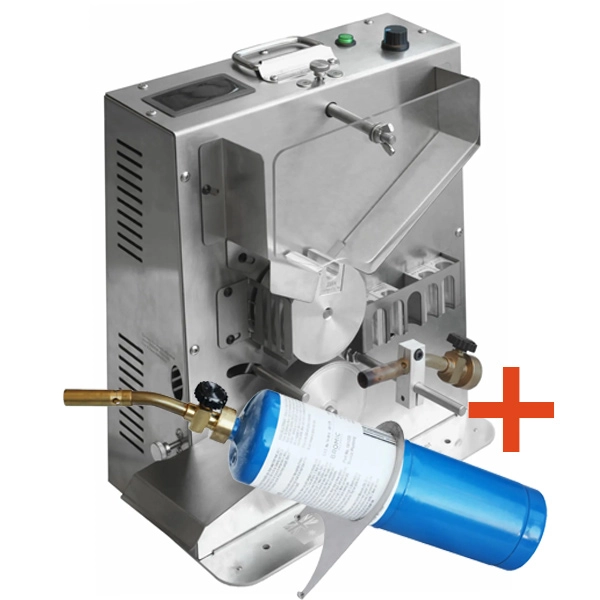
For larger volumes or when maximum consistency is required, induction annealers are the standard. These devices electronically heat the neck to exactly the right temperature, every time.
The Vulcano Induction Annealer combines affordability with the precision of induction heating.
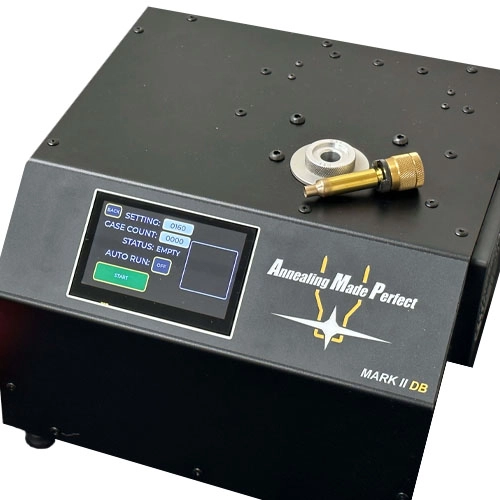
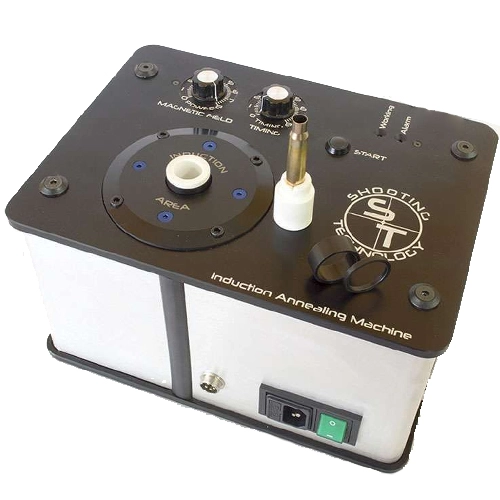
The AMP Mark II DB Induction Annealer is the industry standard for competition shooters who want to get the most out of their brass.
Documentation and Reproducibility
Finding the optimal seating depth is valuable, but only if you can reproduce it. Document all your measurements and settings carefully:
Record for each load:
- CBTO measurement (to ogive, not COAL)
- Jump distance to the lands
- Comparator insert used
- Date of measuring distance to lands (this changes with barrel wear)
- Die setting or micrometer position
Check regularly:
- The distance to the lands, especially after every few hundred shots
- The first cartridges of each loading session
- The neck tension after resizing
Common Mistakes
Measuring to the tip instead of the ogive
This is the most common mistake. COAL says nothing about where the bullet contacts the lands. Invest in a good comparator and always measure CBTO.
Too large increments in the ladder test
Don't jump from 0.5mm to 1.0mm. Smaller increments of 0.1mm give a better picture of where the sweet spots are.
Not re-measuring distance to lands
Your barrel's throat wears. After a few hundred shots, the distance to the lands may have changed significantly. Re-measure regularly.
Ignoring neck tension
Seating depth and neck tension work together. Inconsistent neck tension masks the effects of seating depth variations.
Conclusion
Optimizing bullet seating depth is a systematic process that requires accurate measuring equipment and a methodical approach. By measuring to the ogive instead of the bullet tip, knowing the distance to the lands, and testing systematically, you can find the sweet spot for your specific combination.
Don't forget that seating depth is just one variable in the whole picture. Consistent neck tension, good case preparation, and a carefully developed load all work together for optimal precision. But once you've found and documented the right seating depth, you have a foundation to build on, session after session.
Browse our complete range of measuring equipment and annealing equipment for everything you need to optimize your seating depth.


