


Free shooting targets to download and print
Free targets to print at home. Ten sheets covering zeroing in mrad or MOA, tall target and box tests for your scope, cold bore logging and load development, each one available as a PDF in both A4 and A3.
- Ten targets, each in A4 and A3
- Mrad and MOA grids, true to scale at 100 m
- Free for personal and club use
Download the targets for free
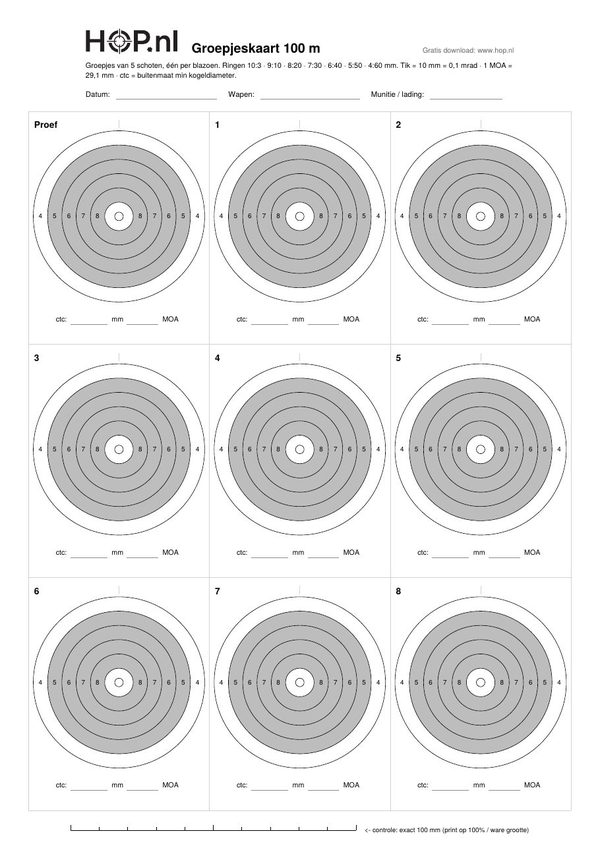
Group target, rings
Our own design, using the ring sizes of the official Dutch KNSA PG100 discipline.
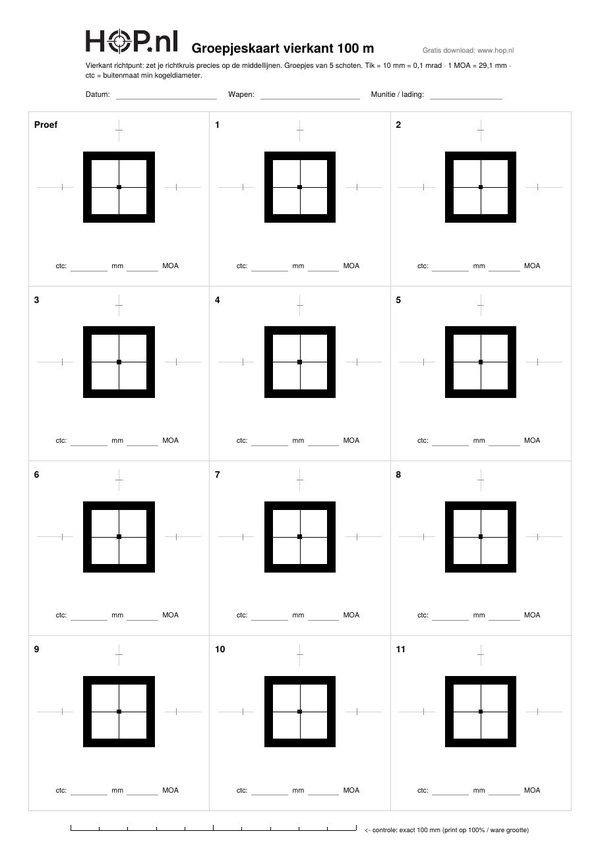
Group target, square
Black frame, white centre. Lines up a crosshair with no guesswork.
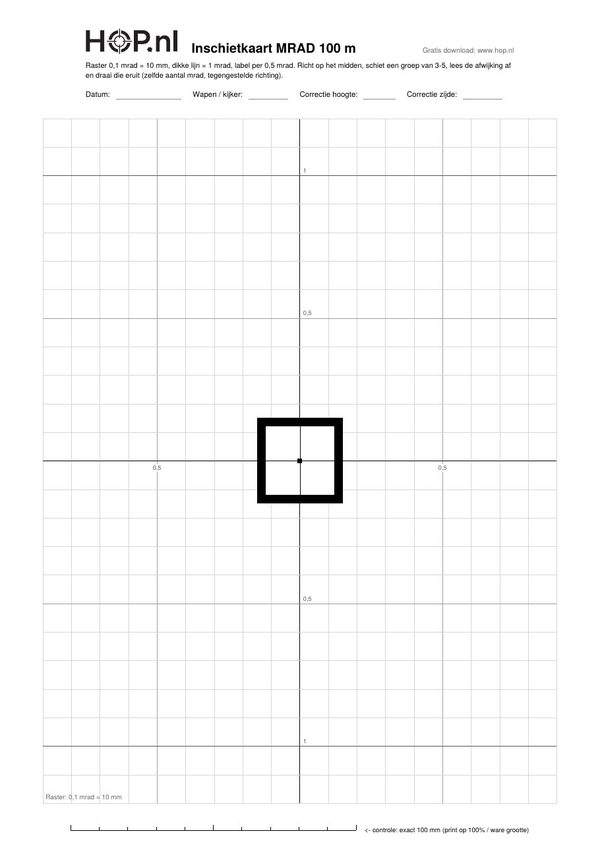
Zeroing target, mrad
0.1 mrad grid (10 mm squares) with a heavy line at every full mrad.
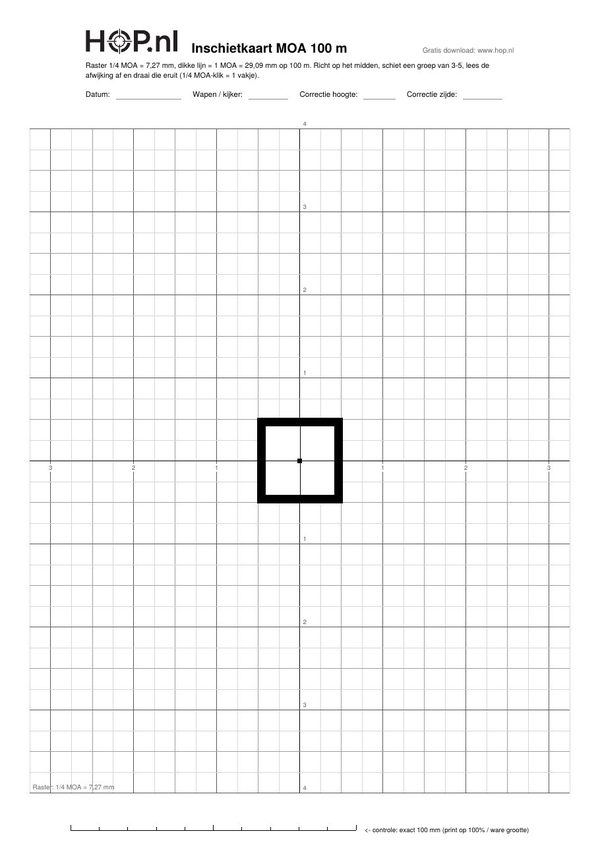
Zeroing target, MOA
¼ MOA grid (7.27 mm squares) with a heavy line at every full MOA.
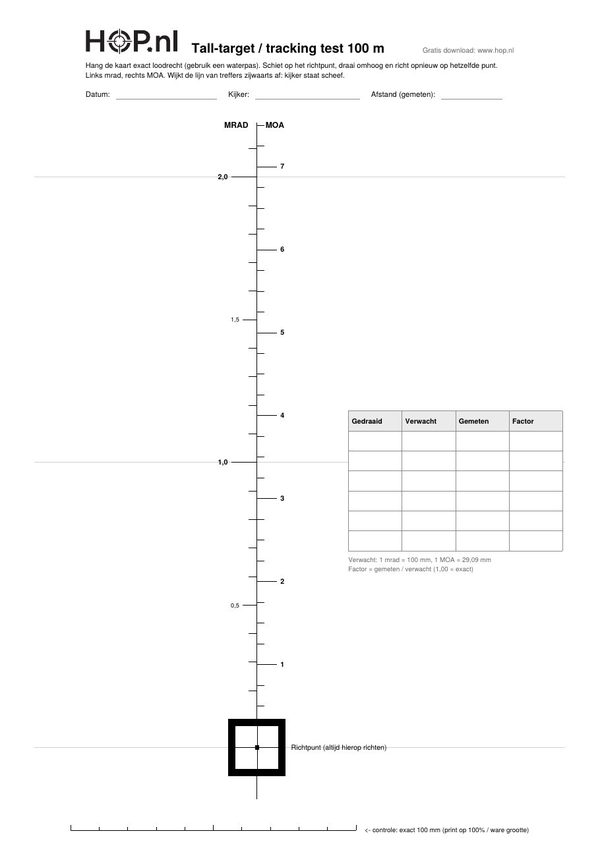
Tall target / tracking test
A plumb line with an mrad scale on the left, MOA on the right and a results table.
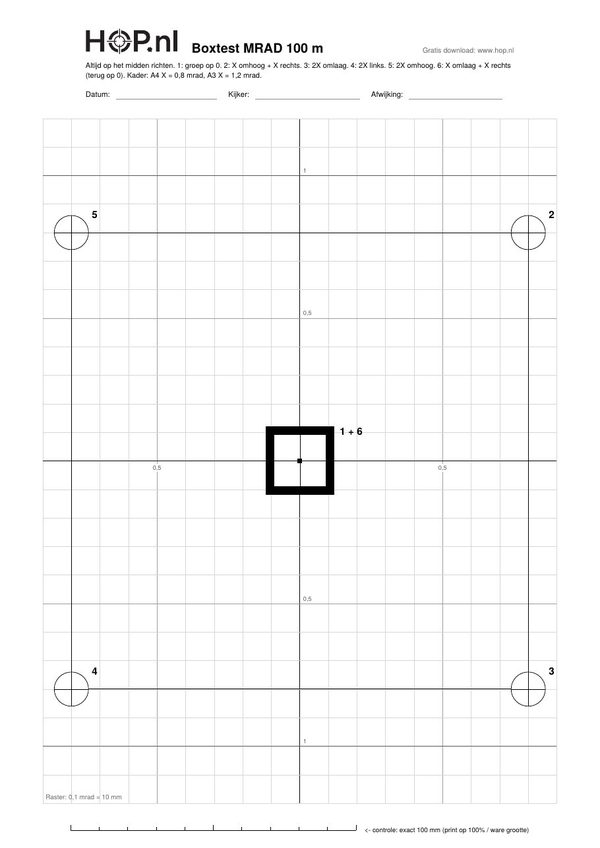
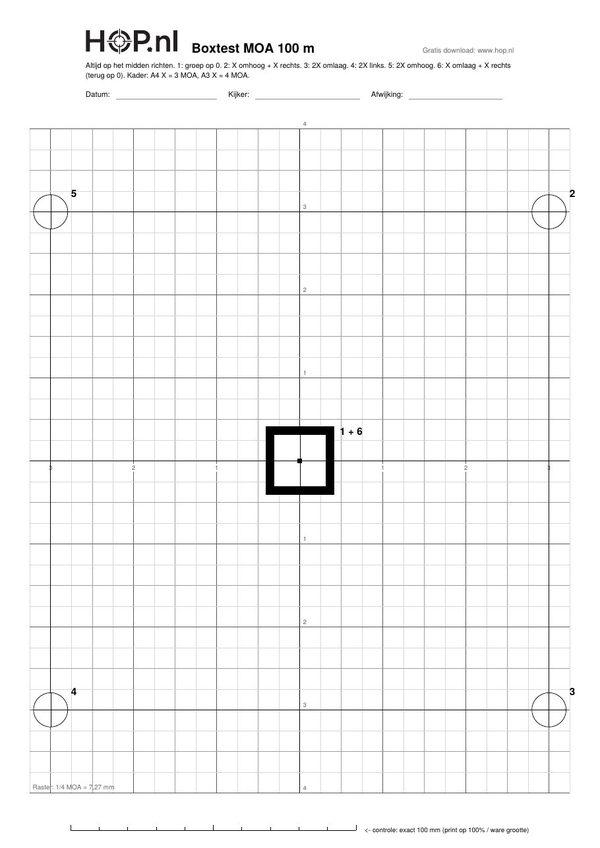
Box test, mrad
Checks whether your scope returns to zero after a full loop. Steps printed on the sheet.
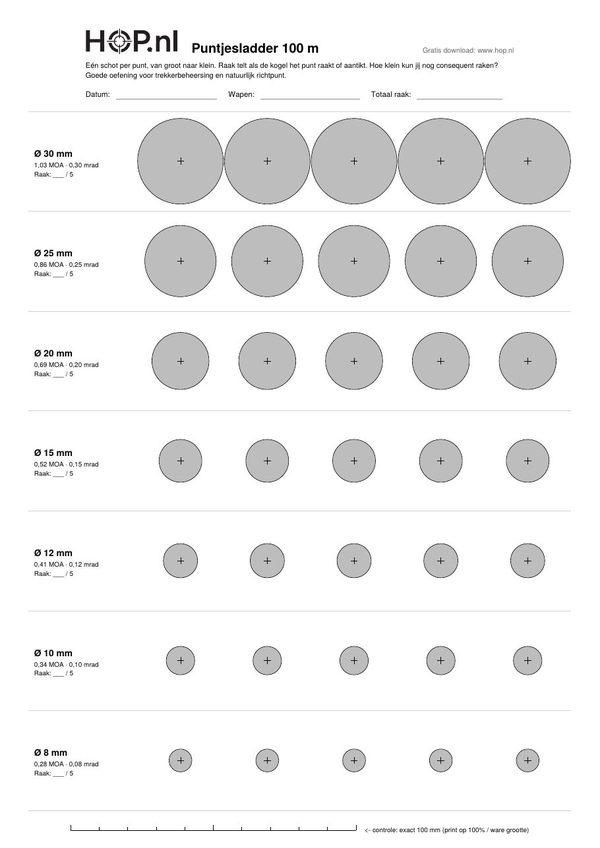
Dot ladder
Dots shrinking from 40 mm (A3) or 30 mm (A4) down to 8 mm, labelled in MOA and mrad.
Load development
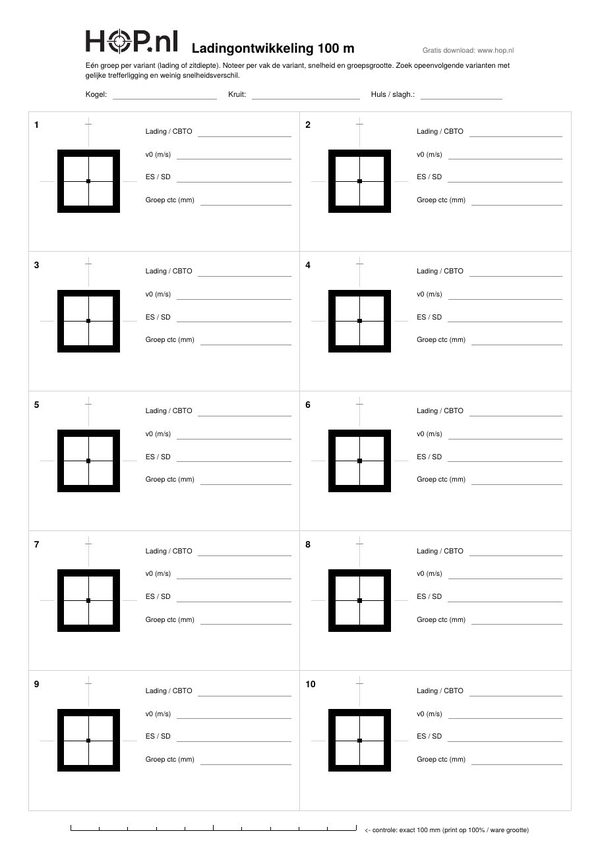
One box per variant, with fields for charge/CBTO, velocity, ES/SD and group size.
Printing at the correct scale
A grid is only worth something if it's accurate.
Set your printer to "actual size" or "100%", and switch off "fit to page". That default setting shrinks the sheet by a few percent, which you'll never spot on paper but will notice at the range when your corrections come out slightly short. Every sheet has a 100 mm reference line along the bottom edge, so check it with a ruler before you head out.
Printing on A3? Download the A3 file. Enlarging an A4 sheet changes the scale.
For best results, print on 160 gsm matte paper. It's stiff enough to stay flat in the wind, leaves clean round holes and doesn't throw glare back at you under range lighting. Standard 80 gsm office paper works too, as long as you back it with cardboard.
Zeroing in mrad or MOA
Both zeroing targets are drawn for 100 metres. The mrad sheet (often called MIL) uses 0.1 mrad squares, exactly 10 mm, with a heavy line at each full mrad. The MOA sheet uses ¼ MOA squares with a heavy line at each full MOA. Pick the one that matches your turrets. If your scope moves 0.1 mrad or ¼ MOA per click, every square between your group and the aiming point is one click.
Testing your scope: tall target and box test
Clean clicks don't prove your turret moves the right amount.
That's what the tall target is for. Hang it with the plumb line perfectly vertical and fire a group at the bottom aiming point. Dial up a set number of clicks, then fire again holding on the same point. The mrad scale on the left and the MOA scale on the right show how far the group actually moved. If it doesn't match what you dialled, your scope tracks off and your ballistic calculations need to account for it. A group that drifts sideways from the plumb line means the scope isn't square to the rifle. Record each run in the table on the sheet.
The box test is about repeatability. Shoot the centre, follow the printed steps up, across, down and back, firing after each move. Your final shot should land on your first. Both mrad and MOA versions are available, and if you're shopping for glass, have a look at our riflescopes.
Groups, dots and cold bore
Group targets
The ringed group target is our own design, built to the ring sizes of the Dutch KNSA PG100 discipline target (10 to 60 mm rings), so you practise on the same scale you compete on. The square version puts a white centre inside a black frame, so you can centre your crosshair precisely. At high magnification, where a round bull tends to disappear behind the reticle, that makes a real difference.
Dot ladder
One shot per dot, working from large to small down to 8 mm. Each row shows the dot size in MOA and mrad, and you score how many of the five you hit. A simple drill for trigger control and natural point of aim. You'll quickly find the size where it stops being easy.
Cold bore target
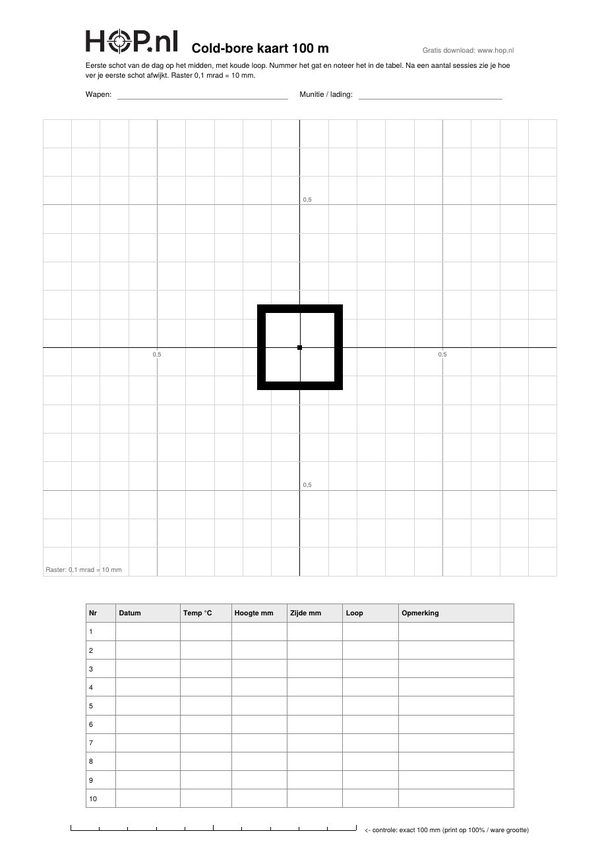
The first round from a cold, clean barrel doesn't always go where the rest do. Fire that one shot at the aiming point each session and fill in the log. Ten sessions later, you'll know your barrel's habits.
Load development
Built for handloaders. Each variant gets its own box, with fields for charge or CBTO, muzzle velocity, ES/SD and group size, which keeps a ladder test or a seating depth series readable at a glance. Look for neighbouring variants with the same point of impact and little velocity spread. Write the chronograph numbers next to the group while you're still at the bench. Measure groups centre to centre across the two widest holes, minus one bullet diameter.
Terms of use
All targets are free for personal use and for use at your shooting club. Print as many as you like. Reselling them is not permitted, and the Hop.nl logo stays on the sheet.
Missing a target you'd like to see here? Get in touch and tell us what you need.
Frequently asked questions
Why does my printed grid come out too small?
Your printer is scaling the file. Choose "actual size" or "100%" in the print dialog and switch off "fit to page".
Should I use A4 or A3?
The grids are the same scale on both sizes, A3 simply gives you more room. The box test, for example, uses 1.2 mrad or 4 MOA steps on A3 against 0.8 mrad or 3 MOA on A4. Always download the file that matches your paper, because enlarging an A4 sheet to A3 changes the scale.
Can I use the grids at other distances?
Yes, with a quick conversion. One square on the mrad sheet equals 0.2 mrad at 50 metres and 0.05 mrad at 200 metres. On the MOA sheet, a square is ½ MOA at 50 metres and ⅛ MOA at 200 metres.