Two jaws, a display, a zero button. A caliper looks almost too simple to think about.
Yet for many reloaders, this is exactly the tool where most errors originate. Not because the instrument is poor quality, but because a caliper only gives back what you put in. You as the user determine how reliable that 0.001" reading actually is. The caliper does its part, the rest is your technique and discipline.
Parts worth knowing
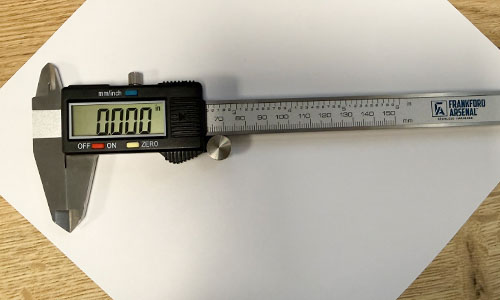
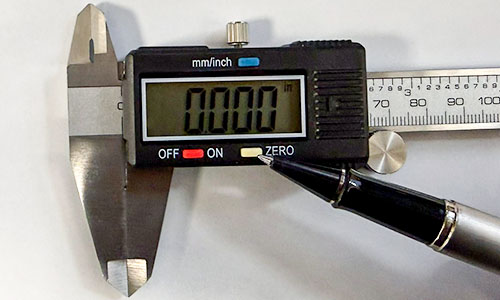
The photo above shows the caliper as a whole. The fixed jaw is attached to the beam and does not move. The sliding jaw travels along the beam and sends the measurement to the display. Along the bottom edge sit the inside jaws for internal measurements, and at the far end of the beam is the depth rod.
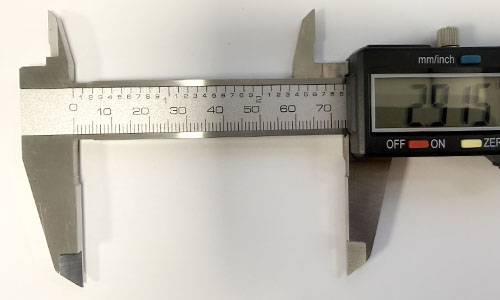
This close-up of the beam shows clearly how the fixed and sliding jaws relate to each other. Then there is the locking screw to hold the slide in position, and the thumb roller, the small wheel on the slide. That last one gets less attention than it deserves. More on it under measuring pressure.
Cleaning
Contamination in a reloading room is unavoidable. Powder residue, primer compound, case lube, it all lands on your tools eventually. A dirty caliper does not measure correctly, regardless of what the display shows.
The jaws
The measuring faces are the most critical surface. Even a thin film of grease or dust throws off your zero, which means every measurement after that is systematically wrong. That sounds dramatic, but it is simply what happens.
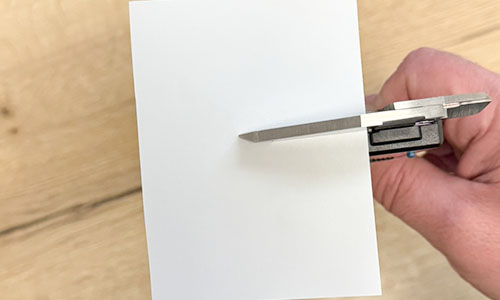
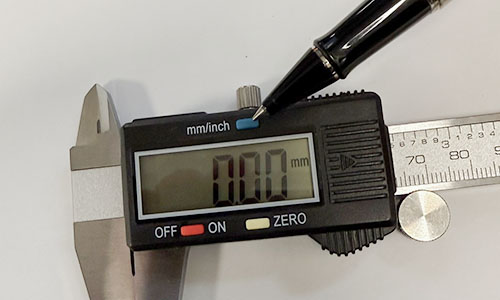
Take a sheet of ordinary printer paper and place it between the jaws, as shown in the photo above. Close them, then pull the paper out with light, steady resistance. Repeat until the paper comes out clean with no residue transferring from the jaws. No cleaning agents, no cloths that leave fibers behind. The paper picks up grease and dust without touching the measuring faces. Do the same with the inside jaws, they pick up contamination just as easily, especially if you use them on case necks.
Beam, slide and battery contacts
The inside of the slide collects grease and dust over time, which creates drag and affects smoothness. A dry cloth or cotton swab along the beam and inside the slide is enough. No oil, oil attracts dust and can migrate onto the measuring faces.
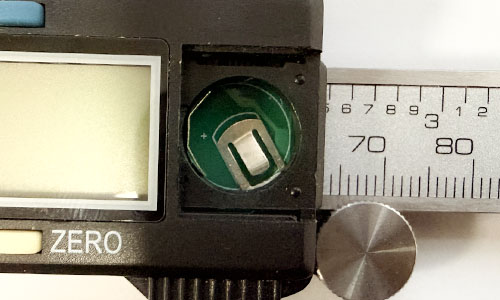
Oxidation on the battery contacts, visible in the open compartment shown above, causes intermittent display errors or readings that drift slowly after an auto-off cycle. Pull the battery every few months, wipe the contacts with a dry cloth, replace it. Takes thirty seconds.
New caliper: degrease it first
Almost everyone skips this. A new caliper arrives with a factory preservative on the beam, a light protective grease. Use it straight from the box and the jaws will not zero correctly, and the slide will feel stiffer than it should. Wipe down the beam and jaws with a cloth dampened with IPA, let it dry, then zero.
Zeroing
The zero button, indicated in the photo above, is the first thing you use at the start of every session. But there is more to it than pressing and moving on. Before you zero, check that the jaws actually close without force. If you have to push the slide to get them fully together, you are measuring a tensioned instrument. The display reads zero, but you are starting with an error already built in. Close the jaws with the same light pressure you use when measuring, then zero. That sequence matters.
Zeroing is not calibrating
Zeroing corrects your starting point. Calibrating checks whether your instrument gives accurate readings across its entire range. A caliper can sit perfectly at zero and still read 0.002" off at 1.500" due to wear on the measuring faces or beam. Professional calibration with certified gauge blocks exists but is not necessary for reloading. Your own repeatability tests, covered shortly, give you what you need to know.
Inch or millimeter
Always check which unit the display is showing before you start. The toggle button is shown in the photo above. A millimeter reading interpreted as inches produces an error that is not immediately obvious but makes your entire dataset useless. Set the unit at the start of your session and leave it alone.
Measuring pressure: where most errors actually come from
How hard you close the jaws determines the reading. Not slightly. Meaningfully. The same case, two different closing pressures, and you are easily 0.0005" to 0.001" apart, sometimes more. At the tolerances you are working to, that is the difference between a good round and one outside spec.
The difficulty is that measuring pressure is felt, not seen. And feel is deceptively inconsistent, especially after measuring twenty cases in a row.
Thumb roller or thumb on the body
Use the thumb roller. The small wheel on the slide is not there for convenience, it is there for consistency. Moving the slide with your thumb pressed directly against the body of the caliper varies the closing force from measurement to measurement, almost unavoidably. The thumb roller sits as a mechanical step between your hand and the slide, and you feel much more clearly when you have reached the right resistance.
Sometimes your thumb is more practical, for a longer object or an awkward position. That is fine. But be especially deliberate about your pressure in those cases, always to the same light resistance, always stopping at the same point. Practice by measuring the same object ten times in a row, paying attention only to whether the tactile sensation is identical each time. That awareness alone makes a significant difference.
Repeatability: testing yourself and your instrument
Do you get the same reading from the same object every time? If the answer is "not really," something is off, with your technique, your instrument, or both.
Take a case or bullet you measure regularly. Measure it ten times, write down each value. Open the jaws fully between measurements, all the way back, then close again. This also checks whether the slide returns consistently. Spread within 0.001"? You are working well. Larger than that, start by cleaning the jaws, then look critically at your measuring pressure.
There is a quick additional test that tells you a lot. Close the jaws, open them fully, close again. Five times. Same reading every time means the slide is running smooth and consistent. Small variations between attempts point to friction or debris in the beam. Professional gauge blocks exist for formal calibration but are expensive and unnecessary for reloading. The tests above give you what you need.
Storage
Keep it in its case or pouch, stored horizontally, jaws slightly open. Leaving the jaws fully closed for extended periods puts sustained pressure on the measuring faces. Pull the battery if you are not using the caliper for a while, a leaking battery damages the contacts. Check the measuring faces occasionally for wear, visibly rounded edges on the jaws means your instrument is reading systematically large. Time for a replacement.
The caliper as the foundation of your measurement system
Everything above treats the caliper as a standalone instrument. But there is another dimension.
Combined with a comparator, the caliper becomes the basis for measurements that are simply not possible any other way. A comparator always works with a caliper, it does nothing on its own. You mount the comparator insert onto the jaws, and that combination opens up a different level of measurement entirely.
Base-to-ogive and shoulder bump
The base-to-ogive measurement tells you where the bullet contacts the rifling, not where the tip ends. Overall length varies lot to lot because bullet tips are not perfectly uniform. The ogive measurement does not vary that way, it is consistent per bullet design. If you want rounds that sit consistently in the chamber, this is the number that matters.
The shoulder bump measurement tells you how far back you are pushing the case shoulder during sizing. Too little and the case chambers with resistance, too much and you accelerate work hardening at the case head. Measure before and after sizing and you know exactly what your die is doing.
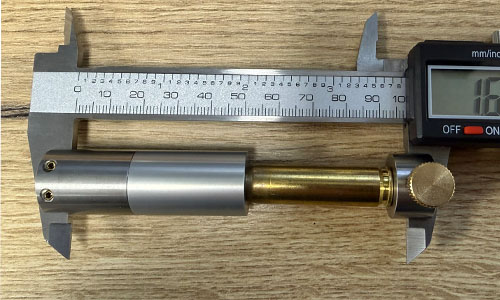
The photo above shows the comparator mounted on the caliper jaws for a shoulder bump measurement. Note the position of the case relative to the insert, this is how you ensure you are measuring consistently at the same point on the shoulder every time.
The Derraco Ugly Headspace and Bullet Comparator Set
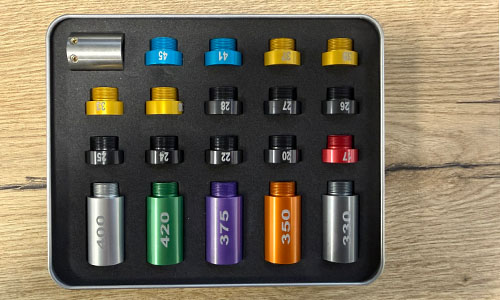
We carry the Ugly Headspace and Bullet Comparator Set by Derraco. The full set is shown above. Derraco is a Dutch manufacturer building precision tooling for reloaders who take their measurements seriously. The inserts fit tight, with no play, because play in the comparator body adds measurement variation on top of everything else you are already managing. With the Derraco Anvil Base extensions, you can also use the depth rod of your caliper as a reference surface for headspace measurements.
A comparator is only as accurate as the caliper underneath it. Inconsistency at the base compounds upward.
Thermal expansion
If your caliper and the object you are measuring are at different temperatures, that technically introduces a small error. In industrial machining this is accounted for. In reloading it is completely negligible. Interesting to know it exists, not worth a second thought during a session.
To summarize
Clean regularly, zero correctly, use consistent measuring pressure every time, and test yourself on repeatability now and then. Add a comparator and you have a complete measurement system. The Frankford Arsenal digital caliper and the Hornady digital caliper are both solid starting points for everything described above.